Monday, April 30, 2012

You Did It! Another Graduation Card.

 You did it!

Another Graduation Card

I guess the weather outside is putting me in the mood, we have May Grey or June  Gloom, your pick. 

Hence, my graduation cards ideas are still flowing in.

I was keeping with the silver/black/ diploma/ round sentiment/ cap from the previous cards, but I added something new, that you might be able to see better on the detail picture below of the bottom left of the card.


I used a cuttlebug embossing folder for the top part of the card, and a mini folder to emboss the "You did it!".


-280-


I also scored two sets of double line on each side of this little sentiment.

The cap and the diploma are propped up with dimensionals.

Until next time!


Saturday, April 21, 2012

Hope You Feel Better Soon

HOPE...
... you feel better soon.

Now, really I can't get enough of this idea...

I had to use it again...

-279-


The only difference here, is that I printed the sentiment and cut it with the Fiskars cloud punch, once the right way and once upside down. 

Here is another version on blue linen:


Until next time...

You Brighten My Day

YOU BRIGHTEN...
... my day

I cannot go on Pinterest without finding inspiration. I am so amazed with the amount of ideas those bloggers have.

Out come a new stamp set, and there goes the flood of OH and AH cards.

I fell in love with the one below from Debby on

http://tsgclearstamps.blogspot.com/2012/04/there-she-goesagain-new-trendsetter.html


Really, don't you think this is adorable?

Now, my turn:

-278-

I run a white linen card stock in a Cuttlebug embossing folder before punching the two size clouds (Fiskars).

It made them look like they are full of rain drops..


The sun is made with a Marvy Uchida 1.2 in punch.

I used one "stick" stamp from Stamps By Judith for the little hanging hearts.

The sentiment was printed before hand and I just made sure that one of the heart came as a "dot" on the "i".

Here is another version of the same card: the sentiment is printed on a banner pulled by a plane... off the card!


Until next time...

Friday, April 20, 2012

Thanks a Latte!

THANKS...
... a latte

A few months ago, my first ever customer Suzan asked me to design some more gift cards holders. She had in mind something earthy, but still classy, to hold a Starbucks gift card.

The card ideas began to flow in, but I was puzzled as to what kind of "apparatus" I was going to design to hold the gift cards.

Let me tell you something: the web is a gold mine for those.

Out of all those wonderful ideas, I chose 4 different ways described below.


1- the hidden gift card:


2- the "W" gift card holder:

http://www.simpleandsincere.com/2008/06/gift-card-holder-instructions.html


3- the classical gift card holder:

 No web site, I just made a simple pocket at the dimensions of a gift card.


4- the very simple gift card holder:

It's a little different version of number 1. I folded the card stock with a small pocket inside, and slide it in a sleeve.


-277-

And to finish, here is the one I made for my customer per her specifications... I thought they turn out beautiful!


Inside detail:


Until next time!


Tuesday, April 17, 2012

I Hope Your Dreams Take You....

 I HOPE....
... your dreams take you...

I always loved this quote.

I used it for my son 18th birthday card but it is so versatile that it would be perfect for a graduation card.

I think the font I chose to print this quote is particularly adequate. 
It is called Fontdinerdotcom Sparkly, and for me it is so close to what writing in a dream looks like.

Every so often, there are some little sparkly stars over the words and I chose to highlight them with one of those Stick stamps from Stamps by Judith.

The ink chosen is a very pale blue, which is not overpowering on the writing.


-276-


The dragonflies stamps were from Recollections.

I double scored the card under the quote and  rounded the bottom corners.

Until next time...

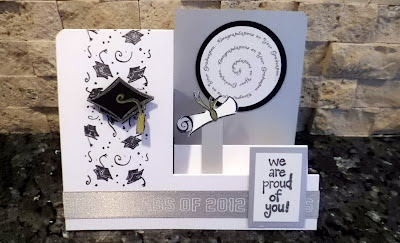
Graduation? Two more!


GRADUATION...
... two more.

I guess I wasn't done with my inspiration. I thought of two more of those graduation cards, this time, going back to basic.

Will that be it for now? Who knows....


-275-

I found this "Class of 2012" ribbon at Michael's. The brand is: Simplicity.com

I am not sure where this designer paper comes from though...

Until next time...

Monday, April 16, 2012

Graduation Stair Steps Cards

GRADUATION...
... stair step cards.

Yep, one more idea! Am I full of those or what?

I had that stack of "Stair steps" cards gathering spider webs, and since I am in the mood for graduation cards, I decided to couple the two, "Graduation Stair Steps Cards" was born.

Nothing new in the stamps used... by now, you are beginning to know those....

I went silver and black for the color scheme, instead of the red and black from our High School colors.


-274-

Until next time!

Saturday, April 14, 2012

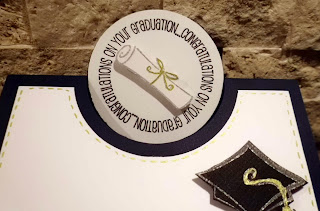
Congratulations on your Graduation

CONGRATULATIONS...
... on your Graduation.

Looking at ordering graduation announcements for my daughter made me think that June will be here in no-time. 

That is all I needed to get back in graduation card mood.

I found that wonderful site on line with round sentiments for any occasion. The advantage is that you can crop them to desired size. 

Check out the site below:

http://rubberstamping.about.com/od/greetingscards/ig/Birthday-Sentiments/

Here are three of them:


And the three graduation cards I came up with.


 -273-

By now, you should be used to the stamps sets I have been using over and over in the past postings. Just one new stamp, these flying caps...without a name of course...


Until next time...

CONGRATS

CONGRATS!

YES... another graduation card... how timely!

No, really, aren't we all surfing the net in search for THE one, the exceptionally clever and never done before graduation card?

Well, good luck... they have all been done before, believe me.

But, that doesn't prevent you to look again, soak in all those ideas, and come up with something a little newer, a little less done.

Below is the one I designed last night.... I know, I know, you've seen some like that before. 

But this one is mine.


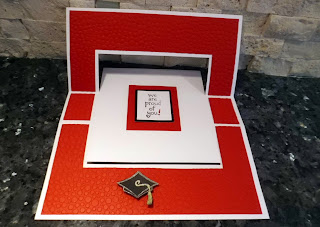
Yep! One of those flip-card! In the landscape position I chose to make this one, it is not that easy to display.

But here is one side:


... and here is the other side.

I left a lot of white there so you can write a little something to the graduate.


-272-

I bought those flip card from A Cut Above: they had a display at the Anaheim scrapbook fair last month.

The red card stock is from paperandmore.com. I run it through a Cuttlebug embossing folder for the framed part and left it plain in the middle square.

The "CONGRATS" sentiment is one of those $1 stamp Michael's used to carry... I cannot find them anymore.

All the other stamped images (the cap, the diploma and the "So very proud of you") are also a $1 set.

Until next time...

Friday, April 13, 2012

Special Though for You

SPECIAL THOUGHT...
... for you

A quick post... 

I had that idea of a heart garland made of flowers, and a pile of designer papers I never had the occasion to use.

Put those two together, et voila!

-271-

The flower is made with a PunchBunch, and to make sure i was following a perfect heart, I press a Nestability heart in the paper and use the impression as a guide. There again, I added puff paint as heart of the flowers.

The designer paper was then taped on a brown card stock, and I stamped a sentiment from a set with no name.

I guess that makes it a wedding or anniversary card.

Until next time...

Thanks Heaven for Little... Ones

THANKS HEAVEN for little...
...ones

Not again? Yes, again...
I told you I couldn't get enough of this Papertrey Ink sentiment.

Tell you the truth, I was completely charmed by a card I found on Pinterest a while ago, check it out on:

http://simplicitybylateblossom.blogspot.com/2011/05/one-layer-wednesday-54-baby-cakes.html


This quilted bottom, was just too cute. I kept wondering how I could achieve this, and two nights ago, I woke up with an EUREKA moment. So simple, I wonder how I didn't think of it earlier.

These cards are the direct results of this "illumination".

(It had to be a New Baby card, because this is what comes naturally to me lately.) 


-270-

I am a little disappointed by the Boy Card picture. For some reason, the "boys" doesn't appear... believe me, the "boys", daisy garland, little bear and "bling" are all the same color of blue. Not evident on this picture.

The sentiment is Papertrey Ink, the little bear was stamped on blue card stock, cut out and propped with dimensionals.

The daisy garland is an EK punch that is going to become one of my favorite tool. Wait and see...

The  blue bling is made with puff paint. 
For the Baby girl card, I used one of those $1 mini punch Michael's carries and put a drop of white pearl puffy paint in the middle.


Now for the quilted effect: I used the Martha Stewart scoring board. But, you are going to ask me, how on earth did I make the scoring diagonally, right? 

Well, I am going to answer, easy enough. The Martha Stewart scoring board has a little envelope making triangle that allow you to position your card stock askew.

This way you can score diagonally.

Now, for you ladies that use a Stampin' Up scoring board, I heard through the grapevines that there is now a Diagonal Scoring Plate that adapts inside the scoring plate and allow you to achieve the same result.

You can check out Dawn Olchefske Stampin' Up site (http://dostamping.typepad.com/dostamping_with_dawn/)

She has the best tutorials and ideas....

Until next time...


Wednesday, April 11, 2012

Welcome Home

WELCOME...
...home.

As we are nearing the return of our loved ones from college (they are coming home, right? Not finding a job close to their college, right????) I thought it would be fun to make a few "Welcome Home" cards.

Of course those would also have a special meaning for our military personnel... because you see, those houses are all the same but the one you call home is shining from the inside.

That is all the difference between a house and a home.


Now, as I was attaching the "home" in the middle of the row of "houses" with dimensionals, I had an idea...

How about if I made that Home still a little more special in coloring it with my copics... Then I couldn't decide if more was less....


 -269-

Colored or shining from inside?


I used a stamp set from The Stamps Of Life, but rather than stamping the sentiment, I printed it out.

I rounded the corners of the card and with dimensionals, popped up the Home.

Until next time...

Good Luck on Your Finals

GOOD LUCK...
... on your finals.

 Keep Calm and Study On....

As the school year comes to an end (where on earth did the time go???), we (the senior waterpolo moms group, as we like to call ourselves)  are going to get together one more time to put together a care package for our sophomore boys in college.

I kept looking for a different idea of what I could put in the box, and I thought Chocolate Chips Cookies... my son's face always lights up at the smell of those cooking... then again if I send them already baked, half the fun would be gone... 

So I had that wonderful idea: Simplified Chocolate Chips Cookies in a Jar.

"Simplified"... and how, you are asking me? Well, I am going to put everything except the egg and the butter. Those two elements are bound to be handy in their kitchen.

So yesterday, I made the tags for the mason jars and the how-to instructions, plus the handy card where every mom will put a good luck message to their son.

Now, since I do not have the mason jar made just yet, I will add the pictures of the tags and instructions later... but I couldn't wait to share the card below.


-268-

I used two different cutting dies; the plain circle is  a Nesting Circle from Lifestyle Craft, and the scalloped one is a Sizzix one.

I folded the yellow card stock in half and cut both sides, leaving them attached at the top.

I ran a white card stock in a Cuttlebug embossing folder and punched two clouds. The sun is made with a Marvy Uchida  punch.

I tried my new Dee Gruenig's brush markers on a DeNami Designs stamp. First time ever I did that and it was so easy, brushing the different color markers on the different arcs of the rainbow. It doesn't dry and I actually stamped the rainbow 4 or 5 times before the colors went away.

I then hand-wrote my sentiment... one of those days, I will know how to type a sentiment in a shape.... but for now...

As for the jar:


As a last minute inspiration, I asked the moms if all their kids had access to an oven... was I inspired to do that... I ended up making 6 jars with trail mix instead. 
Much less pretty...

Until next time.

Thanks ... with a Butterfly

THANKS...
... with a butterfly.

Usually you say thank you with some flowers. But yesterday, I felt like saying thanks with a butterfly.

Each time I clean up my scrapbooking supplies and reorganize them, I found some I had in my possession for a while and never used. I think this is the main advantage of organizing and re-organizing your tools....

The card below is the result of using not one but two "new" tools.


-267-

This Cuttlebug embossing folder was part of a pack and I must admit, I had never seen it! Coupled with the use of puffy paint (my go-to tool) it made a pretty good frame around the card.

Next time, I will try to emboss on the other side, it will give a totally different feeling.

The second unknown to the troops (as we, French say) tool was this butterfly die cut. It makes 4 different butterflies... don't ask me for the brand, there is none on it...

I taped one butterfly down and added a second one with the wings up, and a little puffy paint on the body.

I finished in rounding the corners of the cards...

Until next time....

Happy Birthday (with the help of Martha Stewart)

HAPPY BIRTHDAY...
... with the help of Martha Stewart.

When I first discovered those "punches around the pages" I thought this was the idea of a genius. 

How many time, I ask you, you want to punch a shape in a paper or card only to discover that the "punch" is too close to the edge or not where you want it.

Well, this is where those "punches around the page" come in. 

Exit the frustration, hello the OH MY...


-266-

To keep with the simplicity I am feeling comfortable with these days, I chose to punch a column, and insert a simple sentiment in between.

And to make the motive stand out, I put an insert of white paper inside, which will make it also easier to write a message.

There is not much to it... less than 4 mn start to finish.

Until next time....

Sunday, April 8, 2012

More New Baby Cards

MORE...
... new baby cards.

I don't know if you have had that experience before, but it happened to me all the time. I browse the web, or spend one hour or two on Pinterest or get lost in those talented ladies blogs, and I found a card that just talk to me.

 I then look at the author name and sure enough, it is the designer I admired just a minute ago for another of her card.

I can count those ladies on the fingers of one, OK, may be two hands.
I really admire what they do.

Tracy is one of those.

Check out her blog:
http://whoistracy.com/myhead/

Look at her latest design:


Now tell me if you don't just love this one.

This inspire me to make yet another set of new baby cards.


-265-

I used the Papertreyink  "Welcome Little One" stamp set. I can't get enough of this stamped sentiment.

The frame is also cut from a Papertreyink die.

The little ducky was punched with a EK punch, and I used lot of dimensionals to makes the duck and the frame stand out.

I rounded the two bottom corners and added a piece of ribbon.
That's it!

Until next time!